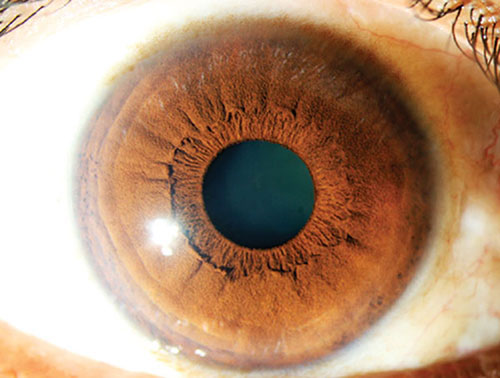
NORMAL ANATOMY OF THE CORNEA
- Elliptical from front; 12 mm horizontally and 11.5 mm vertically
- Posteriorly, it is circular with a diameter of 11.5 mm
- Centrally, it is 0.5 mm thick and thicker at periphery
- Cornea is optically clear with homogeneous appearance
- Cornea is avascular and richly supplied by thin non-myelinated nerves derived from fifth nerve
- It is the main refractive element of the eye, constitutes about 43-45 diopter.
NORMAL HISTOLOGY OF THE CORNEA
CORNEA CONSISTS OF 5 LAYERS (FIG. 1.2) (FROM ANTERIOR TO POSTERIOR)
- Stratified squamous epithelium: 5-6 cells deep (continuous with conjunctival epithelium).The epithelial stem cells are mainly located at the superior and inferior area in the limbal palisades of Vogt. They are important for the maintenance of healthy corneal epithelium. They also act as a junction barrier which prevents conjunctival tissue to grow into cornea.
- Bowman's membrane: When injured, leaves behind a superficial corneal scar.
- Stroma: 90% of total corneal thickness and continuous with sclera.
- Descemet's membrane: Elastic, regenerates after any injury.


CORNEAL EVALUATION
Symptoms
The main symptoms of corneal diseases are:
Pain: The cornea is richly supplied by sensory nerve endings. In corneal abrasions or bullous keratopathy, the direct stimulation of bare nerve endings causes severe pain.
Decreased visual acuity: It is caused by loss of central corneal transparency.
Colored halos: They are due to diffraction of light by epithelial and subepithelial edema.
Photophobia: Sensitivity to light.
Lacrimation: It is due to reflex stimulation of the corneal nerve.
Signs
Major signs are in the:
Epithelium: Punctate erosions, edema, filaments, superficial punctate keratitis, and staining with fluorescein and rose Bengal.
Stroma: Infiltrates, edema, vascularization, deposits, and scarring (opacities).
Descemet's membrane: Breaks, folds, localized thickening (excrescences), etc.
Deposition of pigments: Corneal pigment deposition is associated with a variety of disorders. (See Figs 1.15 to 1.23).
Corneal thickness (by pachymetry): Either by the optical or ultrasonic pachymeter:
- It indicates the functional integrity of the corneal endothelium.
- Ultrasonic pachymetry is useful before LASIK and other kerato-refractive operations.
- Central corneal thickness (CCT) measurement is also required for correction of intraocular pressure by applanation tonometer.
CORNEAL EXAMINATIONS
Pen-torch Light and Binocular Loupe:
To assess the gross abnormality:
- In young children who cannot sit for slit lamp examination
- For comatose patients, in lying down position
- For field study or quick screening.
SLIT LAMP EXAMINATION OF THE CORNEA
The slit lamp consists of an illumination system and a binocular observation system, which when correctly aligned will result in a coincidental focus of the slit and microscope (Fig. 1.3).6

It offers a variety of illuminating and observing methods:
- Diffuse illumination
- Direct (focal) illumination:
- Broad beam (parallelepiped)
- Narrow beam (optic section).
- Indirect illumination
- Retroillumination:
- Direct
- Indirect
- Specular reflection
- Sclerotic scatter
Direct Diffuse Illumination (Figs 1.4A to C)
It is a good method of observing the eye and adnexa in general. Diffusers are generally ground glass plates that cover the light source. The slit should be opened wide and the magnification should be set as low as possible to enable a large field of view.
Direct Focal Illumination
This is the most common method of viewing all tissues of the anterior eye; the focused slit is viewed directly by the observer through the microscope. The magnification can be increased quite markedly (10 to 40 or more) to view any areas of interest in greater detail.
Generally, a very wide beam is used for surface study, whilst a very narrow one is used for sections.


-
Once an abnormality has been found, it is easier to determine the precise depth using an optical section. Generally the angle between the illuminating and observation systems should be set around 45 to 60 degrees. A good corneal section will allow at least 4 layers to be seen—tears (outer), epithelium (and Bowman's membrane), stroma seen as the central gray granular area and the fainter back line which is the endothelium (and Descemet's membrane).
-
A useful combination of the two is the parallel-piped section of the cornea, which uses a 2 mm slit width enabling corneal surface as well as stroma to be studied. This allows us to ascertain the depth of any interesting feature, e.g. foreign body, corneal abrasion. Direct illumination on the front surface of the crystalline lens reveals the ‘orange peel’ effect and on the iris allows observation of iris pattern.
Indirect Illumination (Figs 1.7A and B)
Structures are often easier to see under indirect illumination as glare is reduced, e.g. opacities, corneal nerves and limbal vessels. When using the slit lamp, direct and indirect illumination are viewed simultaneously, structures viewed in the illuminated field are seen under direct illumination, but as this does not fill the whole of the field of view, anything which reflects or scatters light from outside the illuminated area is being viewed by indirect illumination.
To view certain features by indirect illumination, first locate it by direct illumination and keeping the viewing system unchanged, swing the lamp to one side.10


Retrollumination
The light is reflected off the deeper structures, such as the iris or retina, while the microscope is focused to study the cornea in the reflected light. Features that are opaque to light appear dark against a light background (e.g. scars, pigments, and vessels containing blood).
For direct retroillumination (Figs 1.8A and B): The observed feature on the cornea is viewed in the direct pathway of reflected light. The angle between the microscope and the illuminating arm is about 60°.
For indirect retroillumination (Figs 1.9A and B): The angle between the microscope and slit-lamp arms is greatly reduced or increased so that the feature on the cornea is viewed against a dark background.
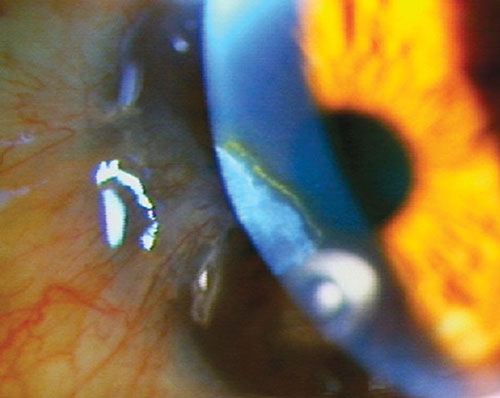
Specular Reflection (Figs 1.10A and B)
This type of viewing is achieved by positioning the beam of light and microscope such that the angle of incidence is equal to the angle of reflection. The light can be reflected from either the anterior (i.e. tears and epithelium) or posterior (i.e. endothelium) corneal surface.
Note that the reflected light should pass through only one eyepiece, and therefore this method is monocular.
Method for viewing the posterior surface:
The angle between the light and microscope arms should be about 50°-60°.
A 2 mm wide parallelepiped and magnification of 20-25 is used.
Find the image of the illuminating bulb, then move the light beam until the image of the bulb is just behind the posterior surface of the parallelepiped (Incidence = reflection when the dazzle from the precorneal fluid is seen).14


16Focus on the back of the parallelepiped. A mosaic of hexagonal endothelial cells will appear. The posterior endothelium and keratic precipitates may thus be studied.
This method of illumination is particularly useful to examine the endothelium layer of the cornea (e.g. blebs, polymegathism), although very high magnification is necessary; at least 40x is required and to see individual cells, at least 80 (Fig. 1.10C).
Sclerotic Scatter (Figs 1.11A and B)
This method uses the principle of total internal reflection. A narrow vertical slit (1-1.5 mm in width) is directed in line with the temporal (or nasal) limbus. A halo of light will be observed around the limbus as light is internally reflected within the cornea, but scattered by the sclera.


19Any corneal opacities, edema or foreign bodies will be made visible by the scattering light, appearing as bright patches against the dark background of the iris and pupil. It is important that the room illumination is as dark as possible.
Oscillatory Illumination
A beam of light is rocked back and forth by moving the illuminating arm or rotating the prism or mirror. Occasional aqueous floaters and glass foreign body in the anterior chamber are easier to observe.
SPECIAL STAINS: FOR EPITHELIAL LESIONS
Fluorescein staining (Fig. 1.12): To stain various corneal pathologies in the epithelium level, e.g. corneal abrasion, erosions, filaments, epithelial defects, dendrite in HSV keratitis, SPKs, for Seidel's test, Tear film break up time (TFBUT), etc.
Rose Bengal staining (Fig. 1.13): Is useful for devitalized tissue, e.g. dendrite in HSV keratitis, PEE in dry eye and other lesions, conjunctival stain in dry eyes. It causes mild to moderate irritations of the eyes.
Lissamine green staining (Fig. 1.14): It is same as rose Bengal, except it does not cause much irritation.
CORNEAL SENSATION
Procedure: Corneal sensation is tested with a wisp of cotton. Patient is explained the procedure and asked to look straight. The wisp of cotton is brought from the side so as to avoid optical blinking. The normal fellow eye is tested in a similar manner.20


Interpretation: Normal blink reflex indicates normal corneal sensation. Cochet-Bonnet Aesthesiometer quantitatively measures corneal sensation.
Causes of decrease/loss of corneal sensation: Neurotrophic keratitis; viral keratitis, corneal surgery (limbal incisions, penetrating keratoplasty, lamellar keratoplasty, radial keratotomy, excimer laser surgery), 5th nerve lesions, topical medications, diabetes, etc.22
PIGMENTS DEPOSITION IN THE CORNEA
Iron Keratoconus | Epithelium |
Old opacity | Epithelium |
Pterygium | Epithelium |
Filtering bleb | Epithelium |
Stroma | |
Stroma | |
Copper Wilson's disease | Descemet's level |
Melanin Krukenberg's spindle | Endothelium |
Dye | Subepithelial |